The Journal · Field Notes
A finished patio without lighting is a daytime patio. The sun sets in Kansas City around 5 p.m. in November and 8:30 p.m. in June, and either way most of the time you want to be outside is in the hours when the sun is gone. Lighting is the difference between a patio you use eight months a year for two hours an evening and one you use twelve months a year for five. It is also the single hardscape upgrade where the cost is small and the impact is enormous, which is why we wire it into every patio design we draw, even when the homeowner has not asked for it yet. Here is what we have learned over ten years of installing outdoor lighting across the metro, including the mistakes people make on their own and the things almost no one tells you up front.
Walk through any home center and you will see boxes of solar path lights and string lights and floodlights, all looking great in the catalog photo. Then drive through a neighborhood at night and almost none of it looks like the catalog. The lights are too bright, too white, pointed at faces instead of features, and spaced wrong. It is not the products. It is the design.
The principle professional lighting designers follow and most homeowners do not: you should see the light, not the fixture. The job of a light is to wash a wall, downcast a column, glow a stone edge, or guide a foot. The fixture itself should disappear into the structure during the day and into the shadow at night. When you walk onto a well-lit patio at 9 p.m. the experience is warm, layered, and quiet. You cannot point at where the light is coming from without looking hard. That is the goal.
LEDs come in different color temperatures measured in Kelvin. The number that matters: 2700K. That is the warm, soft, candle-like glow that flatters skin, makes stone look rich, and makes a patio feel like a room you want to be in. 3000K is acceptable. Anything above 3500K starts to look like a parking lot or a hospital, and 5000K to 6500K is what people buy without realizing and then wonder why their patio feels cold and unwelcoming.
Every fixture we install on a Kansas City patio is 2700K unless the homeowner specifically asks for something different. If you are buying lights yourself, this is the spec to check first. The wattage and the brand matter less than the color. A cheap 2700K bulb beats an expensive 5000K bulb every time on a patio.
Three categories. Worth understanding the differences before you start a project.
Low voltage (12V) is what we use for almost every install. A transformer in a discreet location steps standard 120V house power down to 12V, which then runs through buried cable to all the fixtures. It is safe, energy-efficient, controllable by timer or app, and you can add or move fixtures over time without major rework. The vast majority of professional hardscape lighting in this country is low voltage.
Line voltage (120V) is required for some pergola can lights and any larger pendant or sconce. It needs to be wired by a licensed electrician with conduit and proper junction boxes. We use it where the fixture demands it but otherwise default to low voltage.
Solar is the one most homeowners try first and most homeowners replace within two years. The lights are inexpensive, but the panels are small, the batteries are small, and the output is dim and dies a few hours after dusk on a cloudy day. Solar makes sense as a temporary path marker in a garden bed where wiring is not practical. It does not make sense as the main lighting strategy for a patio.
A common mistake is to light everything. The result feels like a strip mall. The better approach is layered, with a small number of fixtures doing specific jobs and pools of shadow between them. Here is the order we recommend.
First, the steps. Any change in elevation needs light. Built-in recessed step lights, low and warm, let people see where their foot is going without staring into a bright source. This is non-negotiable for safety and is the first thing to wire on any patio with stairs.
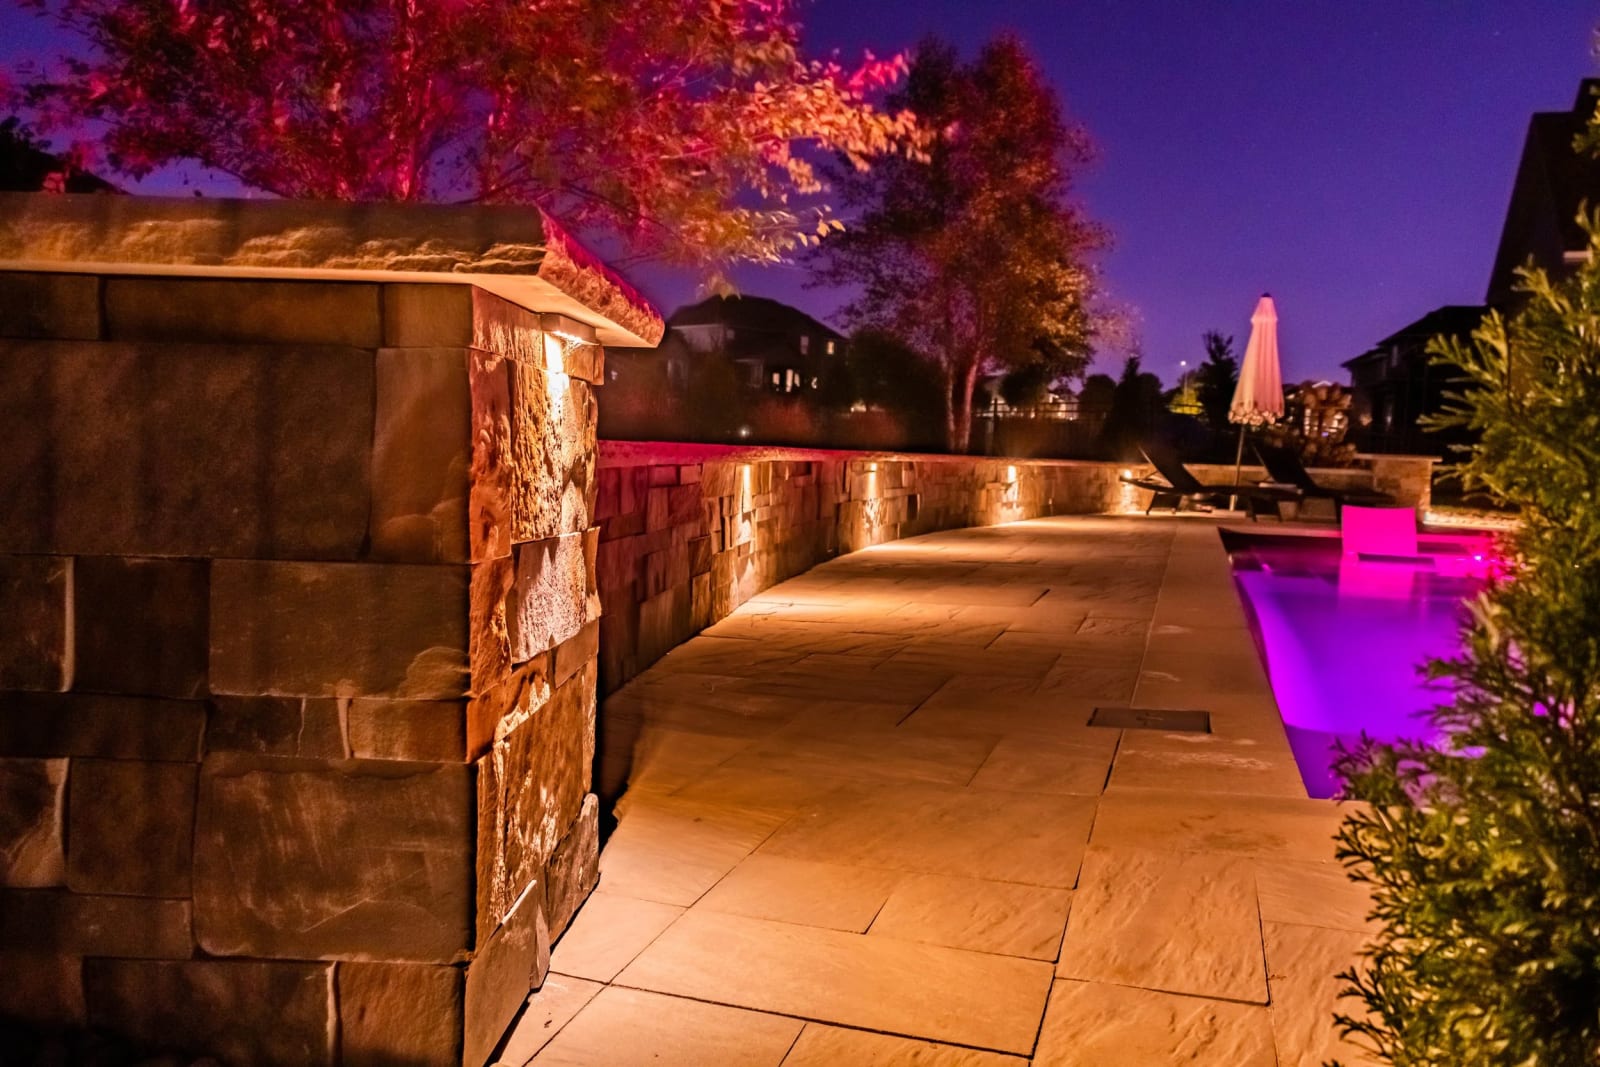
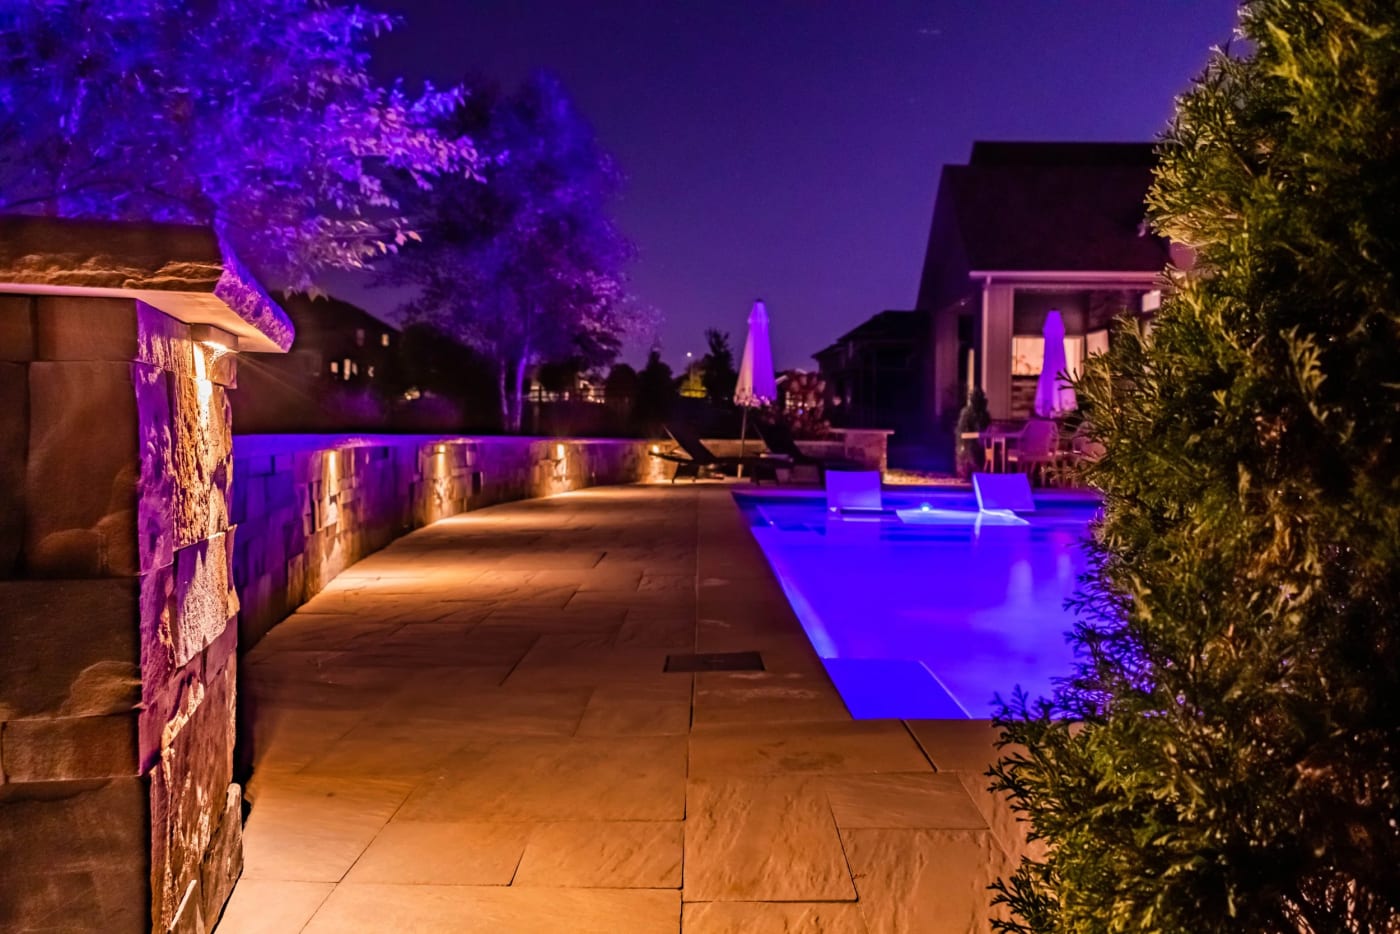
Second, the seating wall caps. A short string of small downlights set into the underside of a seating wall cap throws a beautiful glow on the wall face and the patio surface without any visible fixture. It also turns the seating area into a soft pool of light without making it bright.
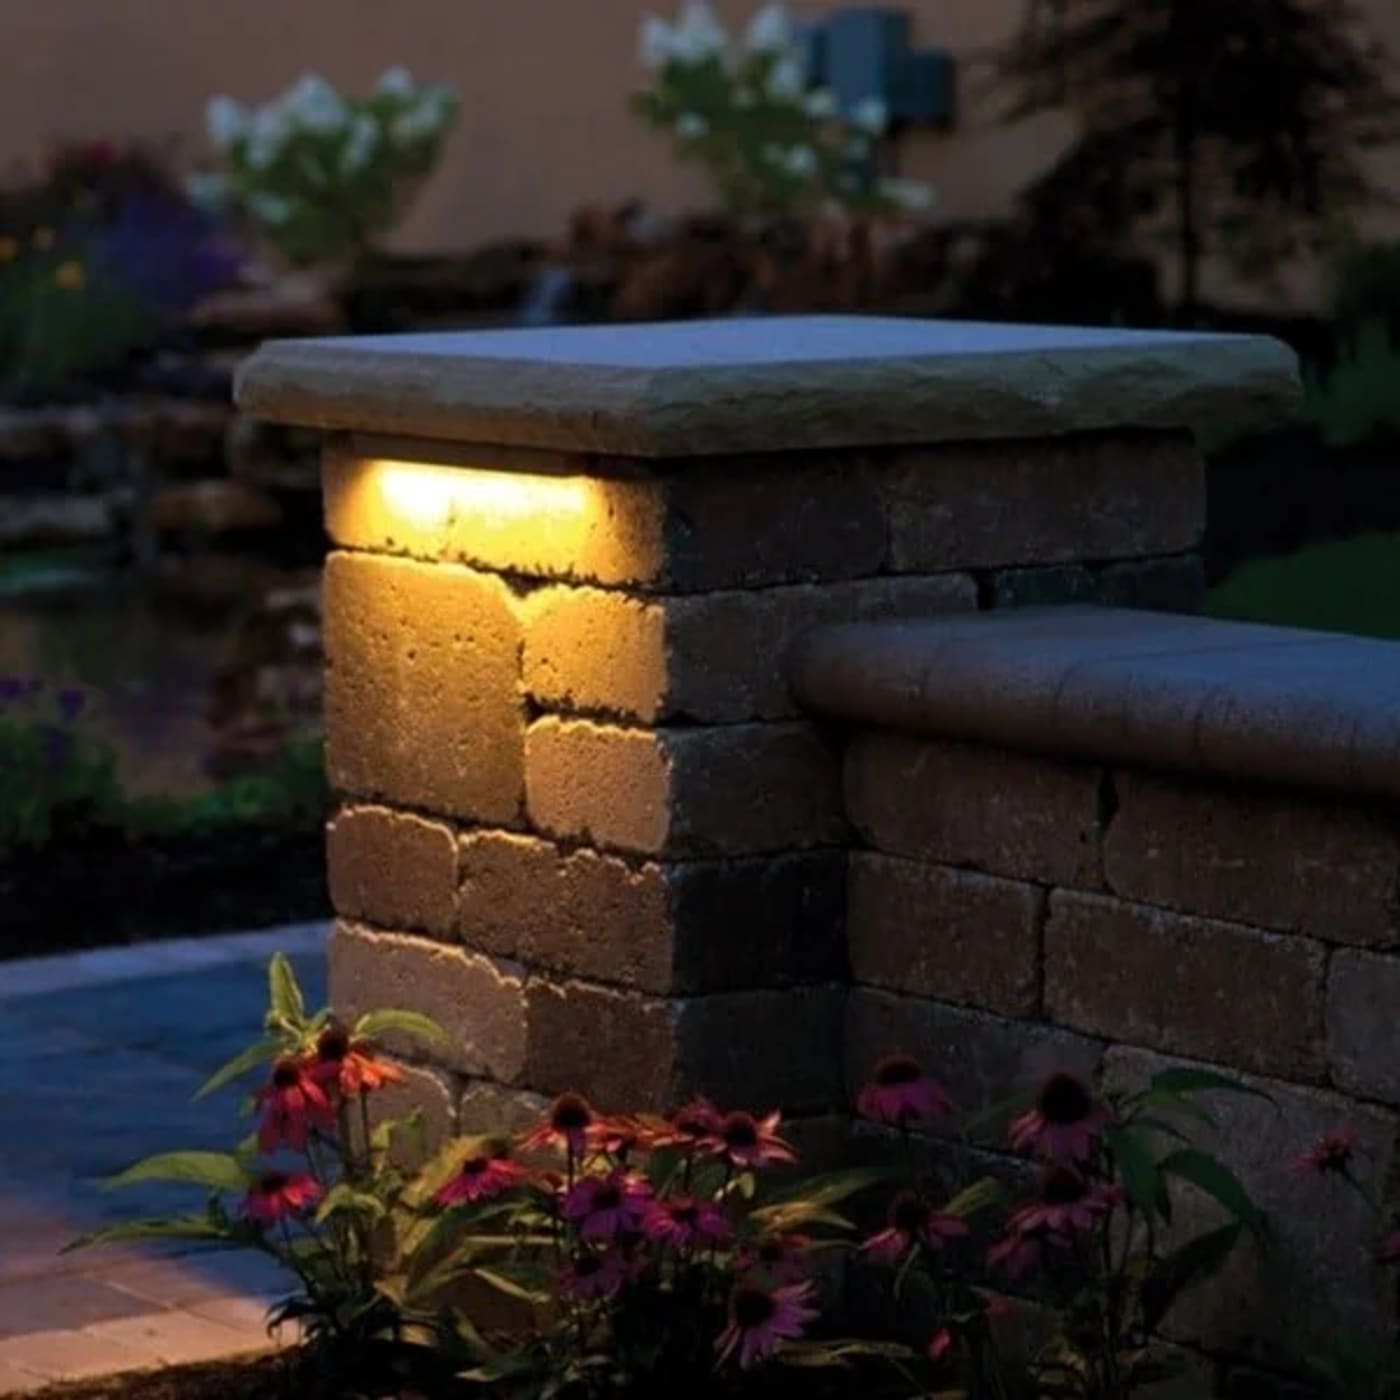
Third, the columns and pergola posts. Uplights at the base of a pergola post, aimed up at the post and the rafters above, light the structure architecturally and create a sense of room. Same idea on stone columns or pillars. The light grazes the texture of the stone or wood and makes it the visual centerpiece without being bright in the eye.
Fourth, the trees. A few well-placed uplights at the base of a mature tree, aimed up into the canopy, gives a backyard the kind of depth that is impossible any other way. Two or three trees lit this way feels like a botanical garden.
Fifth, the path. Path lights guide visitors and prevent twisted ankles but are the most overdone category. Spaced too closely, they look like a runway. We use them sparingly, often less than half as many as the homeowner first asks for.
Pergola lighting deserves its own paragraph because the options are different. Three main paths.
Can lights recessed into the underside of the beams. This is the most architectural option. Wired during construction. Each can is a soft downlight throwing a warm pool onto the patio or table below. Looks built-in because it is built-in. Best for clients who want the pergola to feel like a true outdoor room with an actual ceiling.
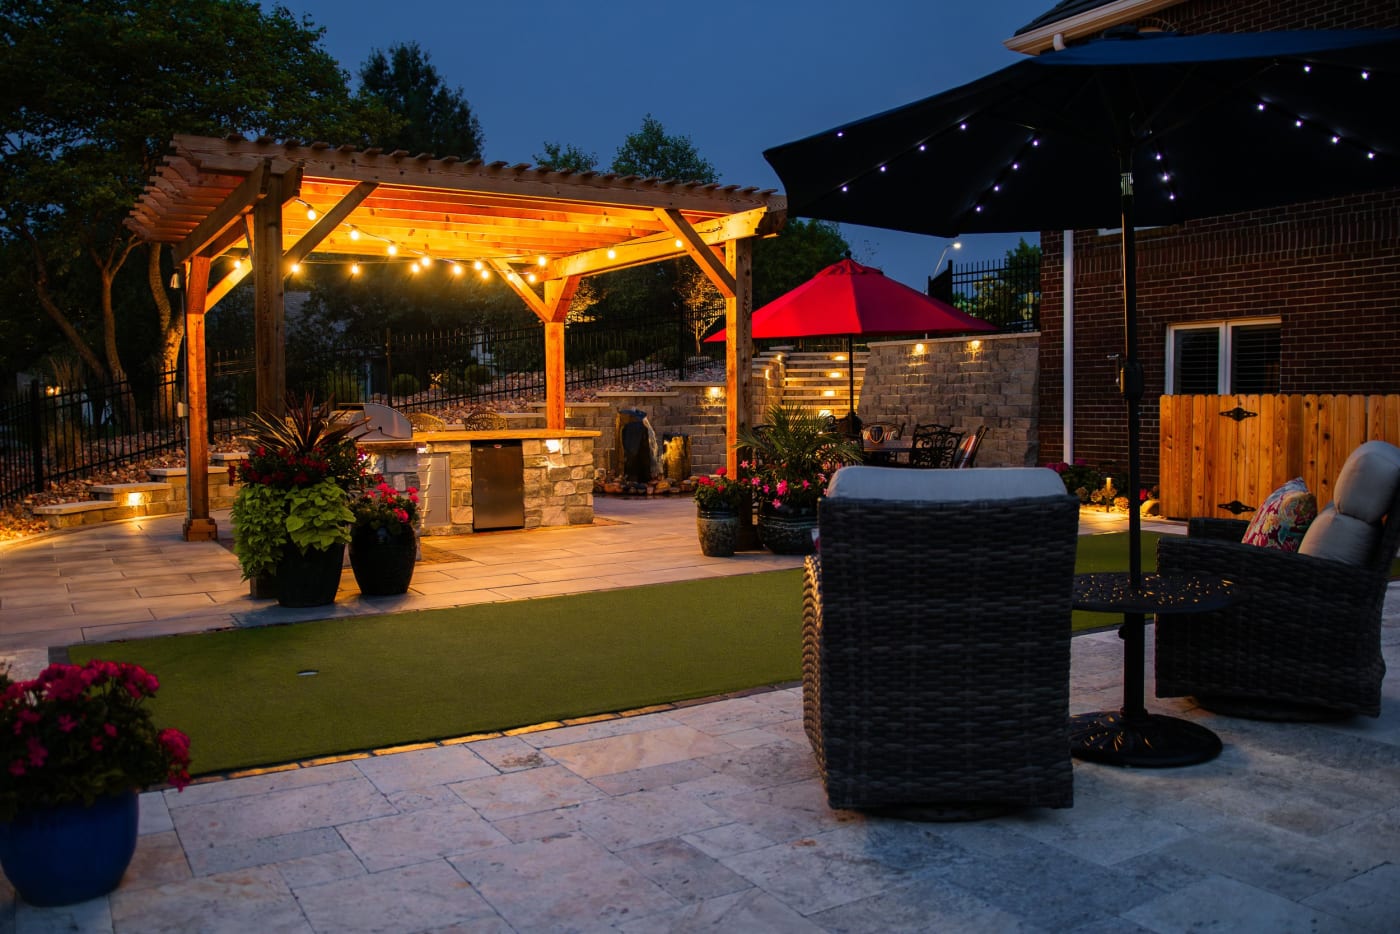
String lights. Cafe-style bulbs strung between posts or in a zigzag overhead. Beautiful, casual, warm. The right call for a casual entertaining space or a pergola over a dining table. Inexpensive, easy to add or remove. Look for commercial-grade strings with replaceable bulbs and 2700K LEDs.
Combination. Cans for general light, strings for ambiance, dimmer on each. This is what we install on most of our larger pergolas because it gives the homeowner a switch for every mood, from full-bright for cooking to low and golden for after dinner.
Five years ago an outdoor lighting system was a transformer with a dial timer. Today every system we install has a smart controller with an app, dusk-to-dawn photocells, and zoned dimming. You can turn the patio lights on from inside, set them to come on automatically at sundown, dim them for a dinner party, and have them shut off at midnight on their own.
The cost premium over a basic timer is small. The quality of life improvement is large. We use a few different control systems depending on the install size, but most of our residential systems land on either FX Luminaire's Luxor controller or a similar competitor. Both let you build zones and scenes from your phone and both have outlived their warranties on every install we have done.
Lighting prices vary with fixture count and quality, but here is the honest range.
A small lighting package starts around $1,500 to $3,000. A standard residential system covering steps, walls, columns, and trees has most clients investing $3,000 to $7,000. A larger property with extensive landscape lighting, pergola integration, and smart controls runs $7,000 to $15,000 or more.
What drives price up: fixture count, brass or copper fixtures (which outlast aluminum but cost more), smart controllers, longer cable runs, and integration into existing finished hardscape (which requires careful cable burial and trenching).
What drives it down: planning lighting at the design phase rather than retrofitting later. Wiring during a patio build adds almost nothing to the project cost compared with cutting back into a finished install.
The most expensive way to add lighting is after the patio is finished. The cable needs to be buried, which means cutting into edges of pavers, trenching across the lawn, drilling into seating walls and columns to run wire to fixtures that should have been integrated during construction.
The right time to plan lighting is the day we design the patio. We pull conduit through seating wall cores, leave stubs at column tops, and pre-wire pergola posts so that when the lighting goes in the cable is already where it needs to be. This is not just cheaper. It looks better, because the cable never has to exit visibly and the fixtures sit cleanly in the structure.
If your patio is already built, lighting can still be added, just plan for it to cost 20 to 40 percent more than it would have at the original build.
Are LED fixtures bright enough? Yes. Modern LED outputs match or exceed the halogen fixtures they replaced, at a fraction of the energy use. The whole industry is on LED now and the quality is excellent.
Will they last through Kansas City winters? Quality fixtures are rated for our climate. The biggest enemy is water intrusion at cable connections, which is why we use waterproof gel-filled connectors on every splice. A properly installed low-voltage system has a 15 to 20 year operational life with occasional bulb replacement.
Can I add fixtures later? Yes, that is one of the main advantages of low voltage. The transformer is usually sized with extra capacity, and additional cable can be tapped in along the existing run.
What about glare from the fixtures? Glare is bad design. Every fixture we use is shielded or angled to direct light onto features and away from eyes. If you walk onto a patio and the light hurts to look at, the install is wrong.
Do I need a permit? Low-voltage systems do not require a permit in most metro municipalities because they are plugged into an existing exterior outlet. Line-voltage work always requires a licensed electrician and may require a permit depending on the city.
How long does installation take? A standard residential install is one to two days. Larger systems with extensive landscape lighting can take three to five days.
If you are planning a patio, pergola, or pool in the Kansas City metro and want lighting designed in from day one, we are glad to walk the property with you and sketch out where each fixture should go. If your patio is already built and you want to add lighting now, we can do that too. Call us at 816-499-2547 or book a free consultation through the Get Started page.
Thirty minutes on site with our designer is all it takes to see what is possible. No pressure, no hard sell.
Schedule a Design Call